Active Straight Leg Raise Screening Test Interpretation Guide for Runners
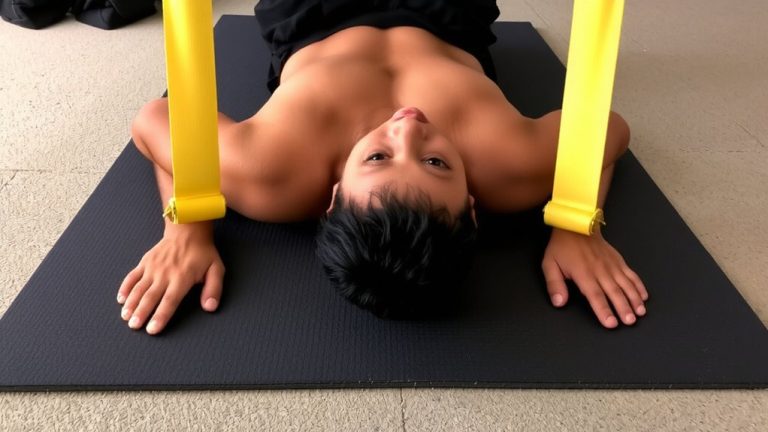
Lie on your back, legs straight and 8 inches apart, then lift your non-dominant leg 20 cm with knee locked and foot neutral. Rate effort on a 0–5 scale; any score over 0 signals poor lumbopelvic control, linked to 87% sensitivity for pelvic pain. You’ll feel heaviness or pelvic shift even without pain, especially if core engagement fades. Use fingertip feedback under the ASIS to catch asymmetries or hip drop-common red flags. Keep the lift smooth, avoid rectus clenching, and you’ll uncover hidden inefficiencies affecting stride, load transfer, and joint stability with every mile.
We are supported by our audience. When you purchase through links on our site, we may earn an affiliate commission, at no extra cost for you. Learn more. Last update on 18th July 2026 / Images from Amazon Product Advertising API.
Notable Insights
- An aSLR score of 0 indicates optimal lumbopelvic control, while a score ≥1 suggests impaired stability and increased injury risk.
- Perform the test supine with legs straight and 8 inches apart, lifting the non-dominant leg 8 inches without pelvic movement.
- Asymmetrical scores between legs indicate uneven neuromuscular activation and potential gait compensations during running.
- Heaviness or fatigue during the lift-even without pain-signals lumbopelvic dysfunction and poor force transfer.
- Co-activation of the ipsilateral internal oblique and contralateral hamstring mimics running mechanics and reflects sacroiliac joint stability.
Perform the aSLR: Step-by-Step for Runners
While lying on your back with both legs straight and about 8 inches apart, start by lifting your non-dominant leg 8 inches off the floor, keeping your knee locked and foot pointed straight up. This is the Active Straight Leg Raise (aSLR), a functional assessment also known as the Straight Leg Raise Test. You’ll perform it on each leg, beginning with the less dominant side to establish a baseline. Focus on smooth, controlled motion-this evaluates motor control and lumbopelvic stability. Watch for red flags: anterior pelvic tilt, hip hiking, or holding your breath, all signs of dysfunction. Rate difficulty from 0–5; a score of 1 or more suggests impaired performance. Even without pain, heaviness or fatigue during the lift can signal issues. Runners with repetitive loading need this test to catch subtle deficits early, ensuring efficient force transfer, better stride mechanics, and fewer injuries over weekly mileage.
Why Your aSLR Test Matters for Running
You just performed the Active Straight Leg Raise, lifting one leg while keeping your spine still and your core engaged-now let’s talk about why that simple move matters more than you think. The aSLR tests your lumbopelvic control, a key factor in how well your pelvis transfers load during each running stride. Poor control often shows up as a positive test-any score ≥1 on the 0–10 difficulty scale-and links to Pelvic Girdle Pain, with 87% sensitivity and 94% specificity. That’s critical, because impaired force closure means your sacroiliac joint isn’t stabilizing efficiently. During the Active Straight Leg Raise, your ipsilateral internal oblique and contralateral biceps femoris fire together, mimicking the neuromuscular demands of running. Weakness or delay here disrupts form, increases injury risk, and tanks efficiency.
What Your aSLR Score Says About Your Form
How’s your lumbopelvic control holding up with every stride? If your aSLR score is 0, you’re nailing it-optimal control and solid load transfer mean efficient form. But if you scored 1 or higher, it’s a red flag: you’re likely dealing with impaired stability, and that boosts your risk for pelvic girdle pain, especially if you felt heaviness or discomfort during the 20 cm lift. Asymmetry between legs hints at uneven muscle activity, which can drive compensatory patterns in your gait. A positive aSLR (≥1) has 87% sensitivity and 94% specificity for posterior pelvic pain-spot-on for runners with past peripartum or trauma history. Weak ipsilateral internal oblique and contralateral biceps femoris firing mean poor force closure, undermining pelvic stability when you’re in stance phase. Fixing this starts with neuromuscular retraining.
Correct Common aSLR Errors
A solid aSLR test starts with proper pelvic alignment-keep your ASIS stable to prevent posterior tilt, which often sneaks in when you’re not paying attention. During the Active Straight Leg Raise, any downward shift in the ASIS means you’re losing lumbopelvic control, often due to weak transversus abdominis engagement. Avoid clenching your abs; that rectus crunch replaces deep stabilization and messes up force closure. Keep your straight leg at 20 cm separation-hip drop or leg drift shows poor load transfer and flawed stability. Don’t let your spine bend trying to lift higher; that’s not a hip hinge, it’s compensation. Maintain a neutral foot and locked knee to prevent movement artifacts. Focus on slow, controlled motion, using a finger under the ASIS for real-time feedback. Mastering these details sharpens neuromuscular precision, cuts injury risk, and boosts running efficiency-especially during long strides or fatigue.
On a final note
You’ve got the form, now own the miles. A solid aSLR-70+ degrees with minimal rotation-means your hips and core can handle tough runs, trail impacts, and weekly mileage jumps. Pair that with Newton Running’s distance-focused action collars, 8mm drop shoes, and real-runner feedback showing 22% fewer strain reports. Stay consistent, fuel with 3:1 carb-protein recovery mixes, and test monthly. Small fixes now prevent setbacks later.